So last February, we moved AGAIN. The house that we moved into is a quaint little 50's brick Ranch - 3 bdrm, 2 bath, full basement, HUGE yard - perfect for our little family. The added bonus, is this large room that had been built on behind the carport. We call it the B.A.R. - Big Ass Room! This room, because it is off the carport, is the entrance we use rather than our front door. When you enter through the door, there is a landing that leads either two steps up into the kitchen, or two steps down into the B.A.R. And behind the door is this "little" space 42" wide X 12" deep - perfect for a little spot for coats, shoes, backpacks, etc.
The whole idea really came about when I found this way cool piece of old wood in the basement stairwell. Don't you love the old chippy paint and raw edge?

There were two pieces both about 72" long that I thought would be perfect for a shelf and a bench... and so the idea started to take shape. But mostly in my head, because it didn't come to full fruition until the last couple of weeks.
Here is a pullback of the entire little "Entry". I'm standing down in the B.A.R., and those two steps lead up in to the kitchen.
I love this wall of "random" things...
The cross was my husband's Parent's.
It used to be gold, so we primed it with the intent
of painting it, but liked the way the primer gave it
an antiqued look.
The mirror was my husband's Grandfather's.
It used to hang in his barbershop.
The candle sconce was my husband's Mother's.
Don't really know the history of it other than it belonged to her.
The bird "thingy" is something I picked up
at a garage sale for $2.00.
It's one of those things that is so ugly it's cute.
It's hand painted on a piece of wood -
there's just something about it that intrigues me.
And the star I got on clearance at
Joann's Fabrics for like $4.00 - loved the color.
Now this little shelf, is also made from something I found here on the property.
Last spring, I found remnants of an old fence and gate,
that were painted this Gorgeous shade of green.
As soon as I found it, I knew I would use the wood
somewhere in the house.
And so, this little "key" shelf was created.
I hung it with a couple of "L" brackets that I had "rusted".
The Windmill photo is one I had taken two summers
ago while visiting my parents in New Mexico.
I then transferred the image onto a piece of wood.
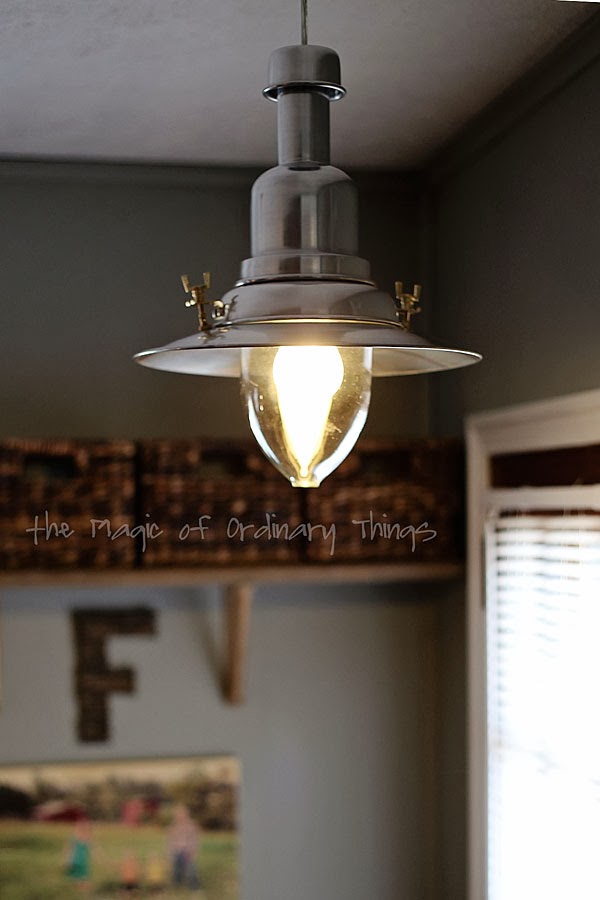
In my mind, this light fixture is the Piece de Resistance of the whole space. It's from Ikea and is only $30. I just love it.
And here's the Mudroom...
We still need to put down new floor, so disregard that nasty looking step. It used to have even nastier looking carpet on it, so the exposed step is much better. If you back to this post, you can see the yuckiness that was this area "before" the transformation.
One of the reasons it took so long for this project to happen, other than the fact that the space needed to be painted, was because I couldn't figure out what kind of brackets to use to support the shelf and bench. For months, I scoured the internet, looking for inspiration and options - but found nothing (without spending an arm and a leg). Then, while looking for something else in my craft supplies, I found some old white metal brackets that had been used at my old house for supporting shelving in the basement. I immediately decided I would just wrap them with twine. They would coordinate with the twine ball light I had just made for over the dining table, which is about 7' away.
For a little bit of artwork, I made our family initial with twigs, and hung a wood image transfer of this year's family portrait.
I don't know if you can see it, but the board for the shelf still has an old cut nail in it.
I so love this space! The piece of wood that the hooks are attached to was also found in the woods behind the house. And the hooks were recycled from our first house.
The absolute best part of this project, was that it cost me less than $10. I had to buy one extra bracket, and I needed a spool of twine - everything else I had either found on the property or I already had, including the baskets on the shelf and the pillows on the bench.
I'm sorry, but don't you just love this light???
And just to give you a little idea of what the B.A.R. looks like...

It's been newly painted, and I just made those drapes using
old IKEA khaki panels I had and a Royal Design stencil.


